Go Back   EcoModder Forum > EcoModding > DIY / How-to
Register Now
 Register Now
 

Reply  Post New Thread
 
Submit Tools LinkBack Thread Tools
Old 01-23-2010, 03:46 AM   This thread is in the EcoModder Project Library | #1 (permalink)
recession proof rebel
 
k.civic.f4i's Avatar
 
Join Date: Sep 2009
Location: california
Posts: 129
Thanks: 16
Thanked 11 Times in 4 Posts
92-95 civic hatchback or coupe foglight cover blocks

sorry. i don't have pictures of EVERY step. let me know if you don't understand any of the steps..... or google the basics of fiberglass and bondo = bodywork

required: plastic sign board, big blue painters tape, LIGHTWEIGHT bondo kit, fiberglass cloth or mat, fiberglass resin, cheap painters brushes, sandpaper(automotive preferred), thick spray primer, spray paint

suggested: a box of latex gloves, paint masks or respirators, spare broken down bumper, coroplast for strength, a lot of time on your hands

difficulty(subjective): 4 out of 10

estimated time: 4 hours minus drying time/ 4 days drying time included

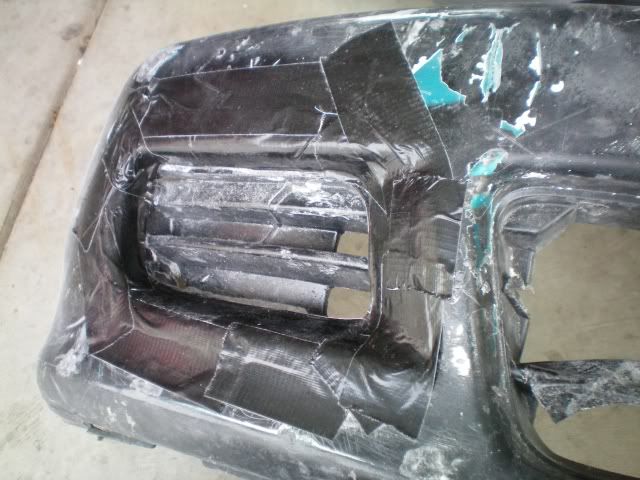
first i taped up all around and inside the indentation. i used black DUCK tape but i would suggest painters tape because of the waxy non stick surface


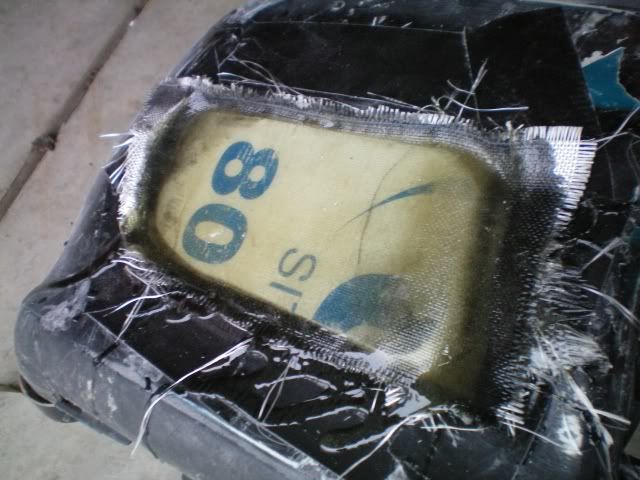
then i used thin cardboard to template of the LOWER(deeper in) part of the indent and copied onto a thin plastic used for signs INSIDE retail stores (think the large price signs at walmart and target)


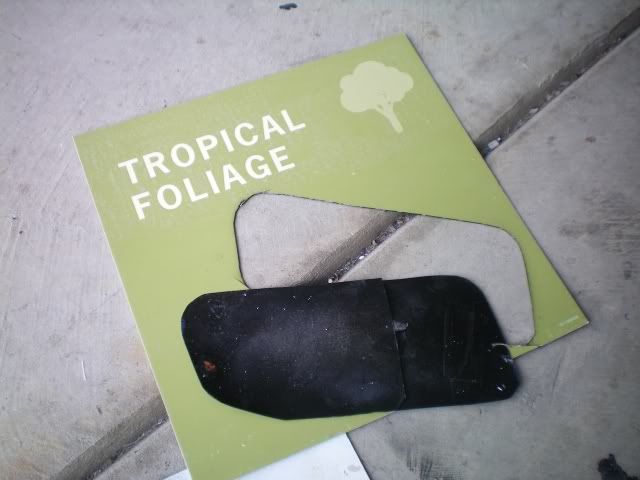
next lay the plastic template to the indent. it has to follow the curve of the indent exactly so back up the template with tape or zip-ties to make sure it doesn't move in the process or else the block wont fit in exactly.


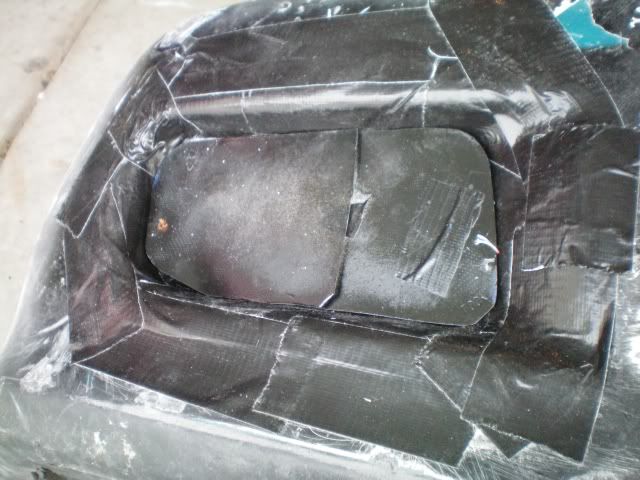
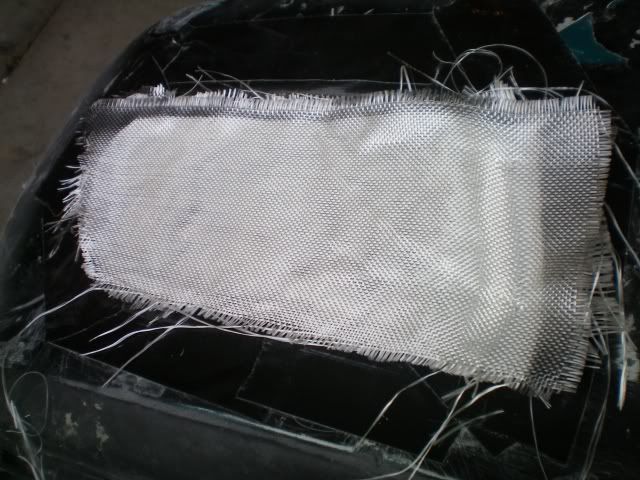
i used fiberglass cloth but you could used fiberglass mat. i had a template of the larger area of where the indent is and traced it onto the fiberglass cloth

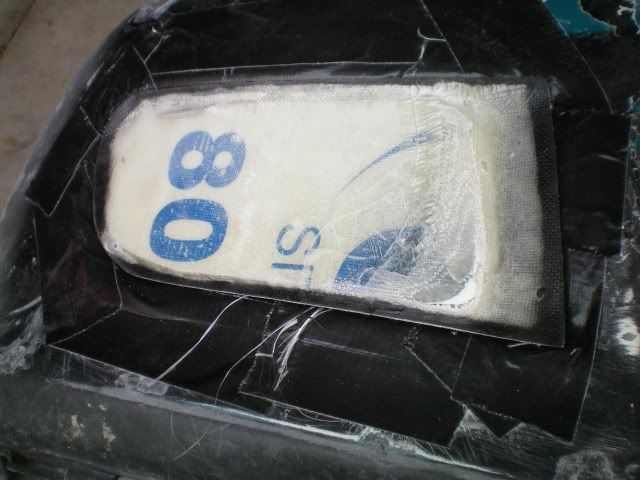
mix your resin, buy some cheap painters brushes(3 inch wide at least or a set of 3 different sized brushes) and lay some resin evenly into the area. lay the first layer of fiberglass making sure there are no bubbles and top it with another layer of resin. while its still wet lay the second layer and so on and so forth until you get the desired thickness.

this stuff takes forever to dry

after it all dried i layed two salvaged coroplast pieces using the same template from the original plastic backing. i should have cut them shorter on the medial sides of them(the part that was closer to the center of the car). brace the pieces by laying a thin layer of resin before you put the coroplast on top and allowing that to dry. then lay a couple more layers of the fiberglass on top making sure there are no bubbles


then let it dry completely and lay a couple more layers on top of that

and lay the resin


the idea is to get it as close to flush as possible to reduce the amount of bondo to use. i suppose you could lay bondo on after the coroplast stage but the way i did it reduced work and cost.

bondo is the next step. lay an even layer of bondo on as evenly as possible. allow this to harden. then sand with 36 or 80 grit sandpaper( this allows the bondo stick to the microscopic teeth). this is why you want to lay it on evenly, to reduce sanding time. time is money.

repeat this process with the bondo until it is FLUSH. make sure you use a sanding block or else it will look and be uneven.

use your hand to feel for high or low spots and add bondo or sand depending on how flush it is.

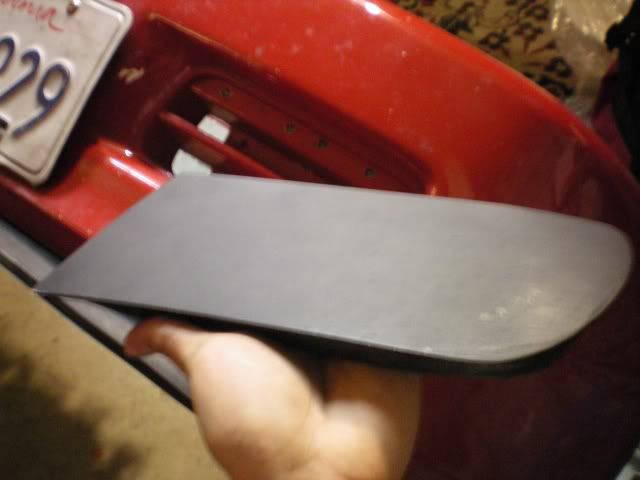
when you are SURE it is flush, do a final sand with 320grit sand paper and spray on thick-laying primer to fill in the teeth.

do many thin layers and allow to dry.

you can wet-sand with 600grit to get it as smooth as a baby's butt( i didn't do this because i was going with ultra-flat black krylon anyway).

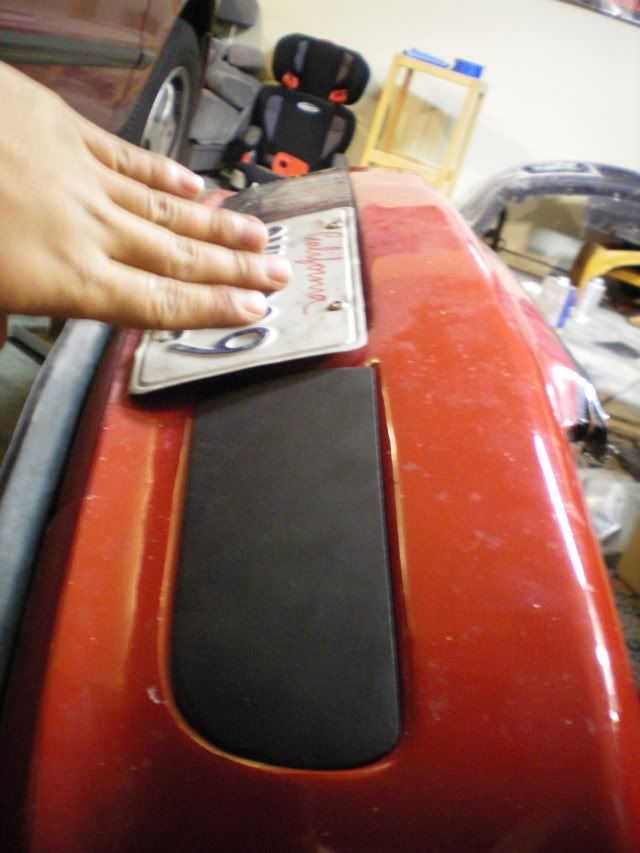
then spray on whichever color you like using thin layers of paint

if you use black primer you can skip this step.

you can do a LAST wet-sand using 2000grit sandpaper to get a more even looking finish(i didn't do that either because i knew it would be exposed to the elements and flying debris)

and viola


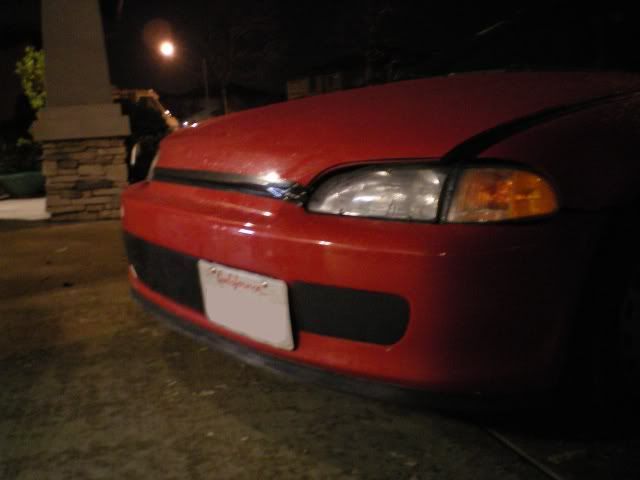
(the center GRILL block is just layers of cardboard wrapped with black DUCK tape and a removable piece near the passengers side edge for air to the radiator in the summer)

__________________
how to.....
http://ecomodder.com/forum/showthrea...cks-11998.html
http://ecomodder.com/forum/showthrea...how-12301.html

true wealth comes from good health and wise ways

Last edited by k.civic.f4i; 01-23-2010 at 04:17 AM..
  Reply With Quote
The Following 4 Users Say Thank You to k.civic.f4i For This Useful Post:
cfg83 (01-25-2010), Christ (02-16-2010), NachtRitter (02-03-2010), Nden (02-06-2011)
Alt Today
Popular topics

Other popular topics in this forum...

   
Old 01-25-2010, 12:08 AM   #2 (permalink)
Grasshopper
 
alohaspirit's Avatar
 
Join Date: Feb 2009
Location: Hawaii
Posts: 964

Makai - '01 Toyota Echo 4D Auto
90 day: 34.45 mpg (US)

New Galaxy - '07 Toyota Prius
90 day: 42.15 mpg (US)
Thanks: 25
Thanked 30 Times in 25 Posts
pictures of the back?
__________________
Past Present Future?
  Reply With Quote
Old 01-25-2010, 02:20 PM   #3 (permalink)
Master EcoModder
 
Join Date: Dec 2009
Location: Leavittsburg, Ohio
Posts: 364

Mater - '98 Dodge 3500 Dually

Wilber - '99 Toyota Corolla LX

Minyatta - '93 Mazda Miata MX-5
Thanks: 102
Thanked 11 Times in 11 Posts
Dude you must be a bodyman! You do amazing work. Thanks for sharing the secrets of a true Ecomodder!

Dave
  Reply With Quote
The Following User Says Thank You to Dave's Civic Duty For This Useful Post:
k.civic.f4i (01-26-2010)
Old 01-25-2010, 05:54 PM   #4 (permalink)
Getting BETTER Mileage
 
Jethro's Avatar
 
Join Date: Dec 2009
Location: Los Alamos, NM
Posts: 108

Lucky No 19 - '11 Ram 1500 Express ST

Venti - '13 Ram 2500 Tradesman
Thanks: 6
Thanked 18 Times in 8 Posts
Looks Great! I'm still trying to see if there is a good not cost prohibitive way of welding plastics together. I'd really like to just fill in my stock foglight holes, along with most of the lower grill opening.
__________________
- Greg
  Reply With Quote
Old 01-26-2010, 08:52 AM   #5 (permalink)
Master EcoModder
 
Join Date: Dec 2009
Location: Leavittsburg, Ohio
Posts: 364

Mater - '98 Dodge 3500 Dually

Wilber - '99 Toyota Corolla LX

Minyatta - '93 Mazda Miata MX-5
Thanks: 102
Thanked 11 Times in 11 Posts
Weld, why not. When those plastic bumpers get a tear in them the weld/melt them & bodyfill the imperfections!

Dave
  Reply With Quote
Old 01-26-2010, 09:19 PM   #6 (permalink)
recession proof rebel
 
k.civic.f4i's Avatar
 
Join Date: Sep 2009
Location: california
Posts: 129
Thanks: 16
Thanked 11 Times in 4 Posts
Quote:
Originally Posted by Dave's Civic Duty View Post
Dude you must be a bodyman! You do amazing work. Thanks for sharing the secrets of a true Ecomodder!

Dave
ive only had 1 semester of autobody. my instuctor said something like that to me too. all you need are GOOD hands to feel.

Quote:
Originally Posted by Jethro View Post
Looks Great! I'm still trying to see if there is a good not cost prohibitive way of welding plastics together. I'd really like to just fill in my stock foglight holes, along with most of the lower grill opening.
ive done plastic welding before. you just need it to be super reinforced by having a metal mesh melted onto the backside(unseen) part of the bumper or by some other means. it just doesn't hold as well. plus the equipment is so much more expensive than what i needed for this project.

thanks.

im working on a mirror delete with an oem look. just about done
__________________
how to.....
http://ecomodder.com/forum/showthrea...cks-11998.html
http://ecomodder.com/forum/showthrea...how-12301.html

true wealth comes from good health and wise ways
  Reply With Quote
Old 01-26-2010, 09:39 PM   #7 (permalink)
...beats walking...
 
Join Date: Jul 2009
Location: .
Posts: 6,190
Thanks: 179
Thanked 1,525 Times in 1,126 Posts
Quote:
Originally Posted by k.civic.f4i View Post
ive only had 1 semester of autobody. my instuctor said something like that to me too. all you need are GOOD hands to feel.
...and lots of sandpaper!
  Reply With Quote
Old 01-27-2010, 03:43 AM   #8 (permalink)
recession proof rebel
 
k.civic.f4i's Avatar
 
Join Date: Sep 2009
Location: california
Posts: 129
Thanks: 16
Thanked 11 Times in 4 Posts
Quote:
Originally Posted by Old Tele man View Post
...and lots of sandpaper!
not really that much sandpaper at all but the right grit is key. i used one 36grit sheet for the bondo to stick to and to knock down any imperfections, one 80grit for after bondo(shaping) and one 320 grit after primer. all together 3 sheets costing about 1 dollar at a local auto paint supplier. 33cents per sheet. i could have used more levels and wetsanded to get it perfectly finished but this was my first attempt so..............
__________________
how to.....
http://ecomodder.com/forum/showthrea...cks-11998.html
http://ecomodder.com/forum/showthrea...how-12301.html

true wealth comes from good health and wise ways
  Reply With Quote
Old 02-02-2010, 07:23 PM   #9 (permalink)
EcoModding Lurker
 
Join Date: Feb 2010
Location: somewhere
Posts: 23
Thanks: 0
Thanked 1 Time in 1 Post
excellent quality
  Reply With Quote
Old 02-03-2010, 07:54 AM   #10 (permalink)
Master EcoModder
 
Join Date: Dec 2009
Location: Leavittsburg, Ohio
Posts: 364

Mater - '98 Dodge 3500 Dually

Wilber - '99 Toyota Corolla LX

Minyatta - '93 Mazda Miata MX-5
Thanks: 102
Thanked 11 Times in 11 Posts
k.civic,

Thanks for taking the time to post, much appreciated! Just one more question, did you have the bumper on or off the car when you created your mold?

Thanks again,
Dave

  Reply With Quote
Reply  Post New Thread


Thread Tools


Similar Threads
Thread Thread Starter Forum Replies Last Post
Why I'm Choosing a Civic Over a Metro Wayneburg General Efficiency Discussion 43 03-02-2011 05:11 PM
Civic coupe? chipX Aerodynamics 5 04-14-2009 10:46 AM
non-op '85 CRX, or '91 civic hatchback SirKeats EcoModding Central 1 05-16-2008 04:21 PM


Powered by vBulletin® Version 3.8.11
Copyright ©2000 - 2024, vBulletin Solutions Inc.
Search Engine Friendly URLs by vBSEO 3.5.2
All content copyright EcoModder.com